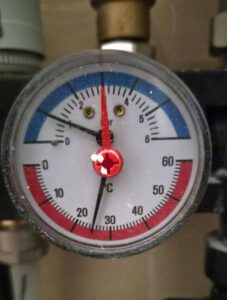
 Spindler – Gebruikershandleiding aanvullend warmte-vloerverwarmingsinstallatie
Hoe water bij te vullen in uw verwarmingssysteem
- een waterslang
- hangt vaak in uw verdeelkast, bij de oplevering van de Cooltoren zijn gele slangen geleverd van voldoende lengte
- één uiteinde van de slang voorzien van een slangaansluiting 3/4″ binnendraad, deze past op de vulopening in de verdeelkast, let op dat het zwarte rubberen ringetje nog in de wartel zit
- het andere uiteinde van de slang voorzien van 1 van de volgende opties, afhankelijk van uit welke kraan water wordt getapt
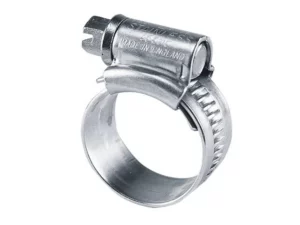
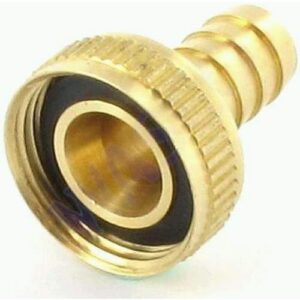
- a) 3/4″ binnendraad slangaansluiting met rubberen ring in de wartel, bij goedkope zit die ring los. Met slangenklem bevestigen
- b) 1/2″ binnendraad slangaansluiting met rubberen ring in de wartel, bij goedkope zit die ring los. Met slangenklem bevestigen
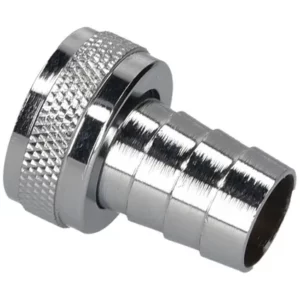 +
+ 
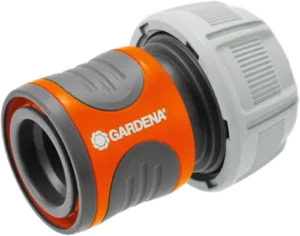
- c) Gardena slangverbinding, voor als u een Gardena kraanstuk aan uw kraan gebruikt, al dan niet met waterdief
- a) 3/4″ binnendraad slangaansluiting met rubberen ring in de wartel, bij goedkope zit die ring los. Met slangenklem bevestigen
- een watertappunt, kraan, dat kan zijn:
- de kraan achter uw wasmachine
- heeft een 3/4″ buitendraad, a)
- deze kraan is soms moeilijk te bereiken als de wasmachine daar voor staat en aangekoppeld is
- de wasmachineslang moet worden losgekoppeld
- er is onder deze kraan geen spoelbak of afvoerputje, dus een emmer of dweil is handig
- de aansluiting van de handdoucheslang op de douchemengkraan of badmengkraan
- heeft een 1/2″ buitendraad, b)
- de slang van de handdouche moet worden losgekoppeld
- onder deze kraan is een afvoer en wat water gespetter bij loskoppelen is geen enkel probleem
- de kraan boven de keuken spoelbak, c)
- heeft een ruime spoelbak met afvoer
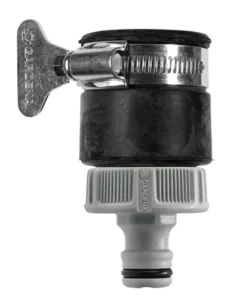
- heeft een extra koppelstuk nodig, bijvoorbeeld een waterdief met Gardena slangverbinding
- kraan boven het WC fonteintje, c)
- zelfde verhaal als bij keuken spoelbak, maar hier is het veel kleiner en krapper en meer gepriegel
- de kraan achter uw wasmachine
- een emmer of kom, om waterdruppels en spetters op te vangen, bijvoorbeeld bij het loskoppelen van de slang na het vullen
- oude handdoeken of dweilen, helemaal droog houdt u het niet altijd
- eventueel een waterpomptang
Hoe water af te tappen in uw verwarmingssysteem
Om de druk te verlagen kan het zijn dat er water uit het systeem moet worden getapt.
- Verbindt de slang aan het vulpunt van de installatie (zie bijvullen)
- steek het andere eind van de slang in een emmer of afvoer
- draai de kraan van het vulpunt voorzichtig open en laat het water langzaam weglopen tot de gewenste druk is bereikt
- sluit de kraan van het vulpunt en ontkoppel de slang
Onderdelen in de vloerverwarming verdeelkast
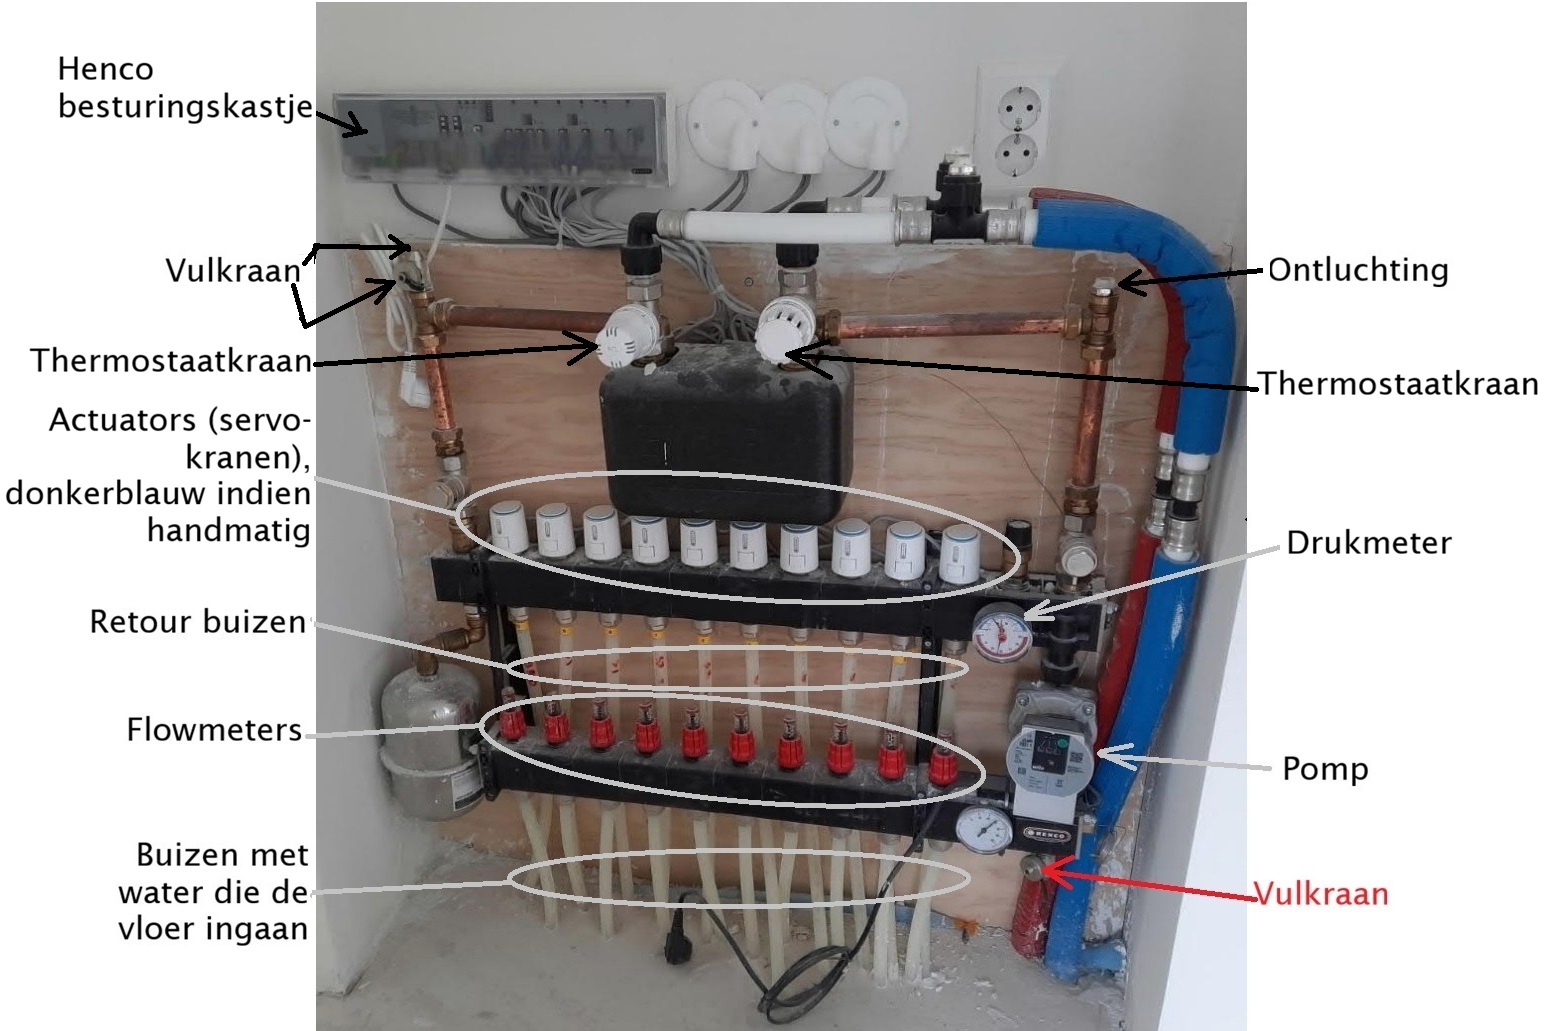
Onze installaties zien er typisch als volgt uit, waarbij de witte ombouwkast hier niet te zien is, deze ombouwkast zit vaak in de weg bij het bijvullen, zodat de vulkraan in het rood niet bereikbaar is.
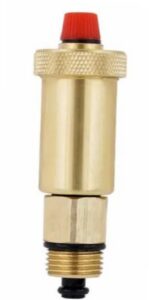
Bovenop de ontluchting zit bij sommige appartementen een automatische ontluchter, die ziet er zo uit:
 English version
General manual for ventilation and underfloor heating: Spindler – Gebruikershandleiding aanvullend warmte-vloerverwarmingsinstallatie
How to top up the water in your heating system
- A water hose
- often hangs inside your distribution cabinet; yellow hoses of sufficient length were supplied upon completion of the Cooltower
- one end of the hose is fitted with a 3/4″ female threaded connector that attaches to the fill opening in the distribution cabinet; ensure that the black rubber washer is still inside the fitting
- Fit the other end of the hose with one of the following options, depending on the water tap being used:
- a) 3/4″ female-thread hose connection with a rubber washer inside the union nut (on cheaper models, this washer is loose). Secure with a hose clamp
- b) 1/2″ female-thread hose connection with a rubber washer in the union nut; on cheap models, this washer is loose. Secure with a hose clamp.
- +
- c) Gardena hose connector, for use with a Gardena tap connector on your tap, with or without a tap adapter.
- a) 3/4″ female-thread hose connection with a rubber washer inside the union nut (on cheaper models, this washer is loose). Secure with a hose clamp
- a water tap or faucet, which can be:
- the tap behind your washing machine
- has a 3/4″ male thread, a)
- this tap is sometimes difficult to reach when the washing machine is positioned in front of it and connected
- the washing machine hose must be disconnected
- there is no sink or floor drain beneath this tap, so a bucket or cloth comes in handy
- the hand shower hose connection to the shower or bath mixer tap
- has a 1/2″ male thread, b)
- the hand shower hose needs to be disconnected
- there is a drain beneath this tap, so a bit of water splashing during disconnection is not a problem
- the tap above the kitchen sink, c)
- has a spacious sink with a drain
- requires an additional adapter, such as a tap connector with a Gardena hose coupling
- tap above the small toilet sink, c)
- same story as with the kitchen sink, but here it’s much smaller and more cramped, and involves a lot of fiddly work
- a bucket or bowl to catch water droplets and splashes—for example, when disconnecting the hose after filling
- old towels or cloths (it is not always possible to keep everything completely dry)
- water pump pliers (optional)
- the tap behind your washing machine
The video below shows the general procedure; subsequently, a few photos are used to explain the details specific to the installation in the Cooltoren.
How to drain water from your heating system
To lower the pressure, it may be necessary to drain water from the system.
- Connect the hose to the system’s fill point (see Refilling, topping-up).
- Place the other end of the hose in a bucket or drain.
- Carefully open the fill point valve and let the water drain slowly until the desired pressure is reached.
- Close the fill point valve and disconnect the hose.
Components of the underfloor heating manifold cabinet
Our installations typically look like this—though the white enclosure is not shown here; this enclosure often gets in the way during refilling, making the fill valve (highlighted in red) inaccessible.
(Drawing to be translated into English)
Some apartments have an automatic air vent on top of the vent pipe; it looks like this: